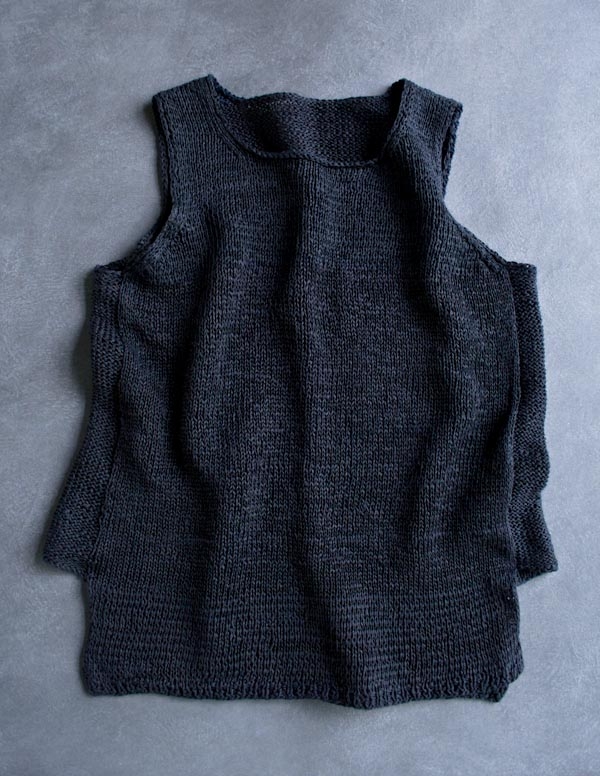
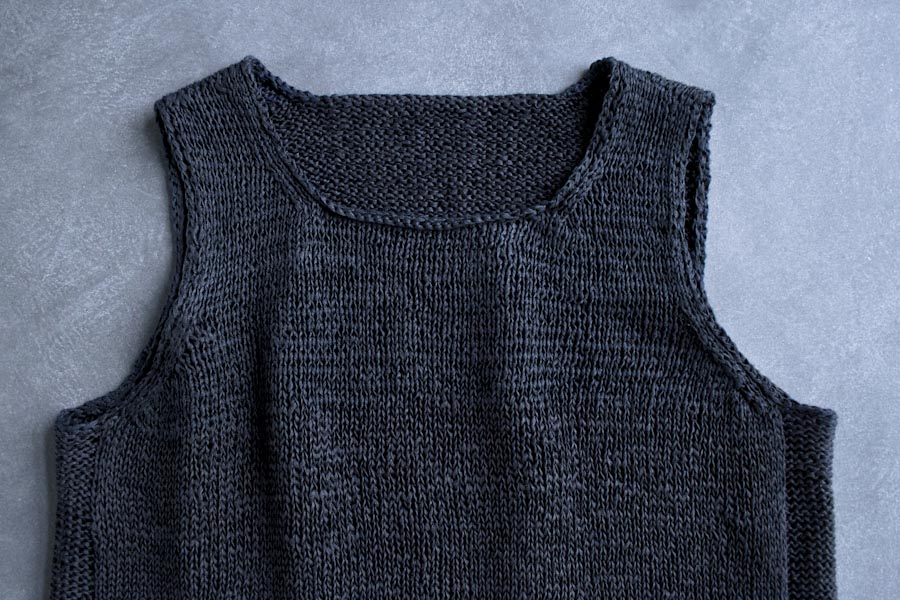

Notched Hem Tank Top
It seems like indigo dye is everywhere right now, from bright blue shower curtains to saturated shirts and pillows to deep dark denim bedding. I’m so smitten with the color I’ve contemplated setting up an indigo vat in my itty-bitty Brooklyn apartment!

But since I can’t imagine my landlord or my roommates being too happy with a dye kitchen in the house, I did a little dance of joy when I saw that Habu Textiles had done the work for me. Knitted Linen in Dark Indigo glows with intensity. Finally, the rich indigo I crave, without the stained hands and sink!

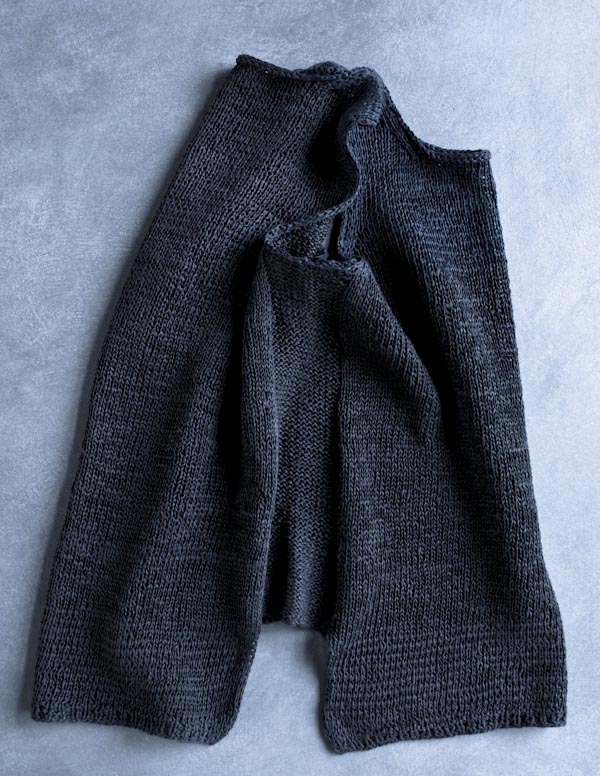
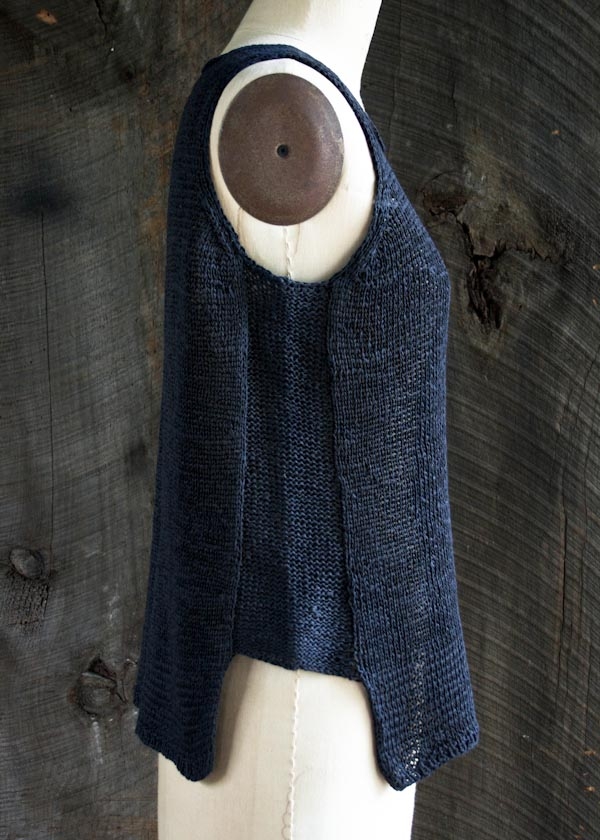
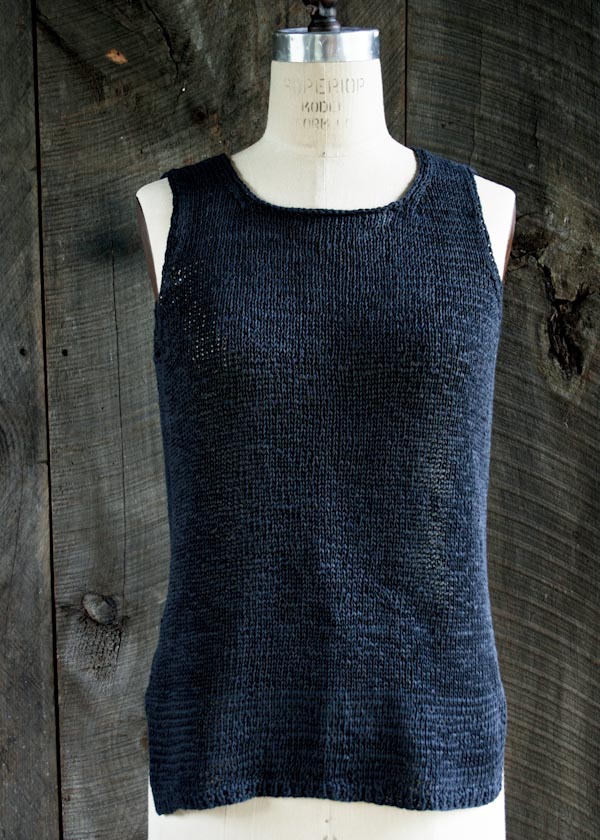
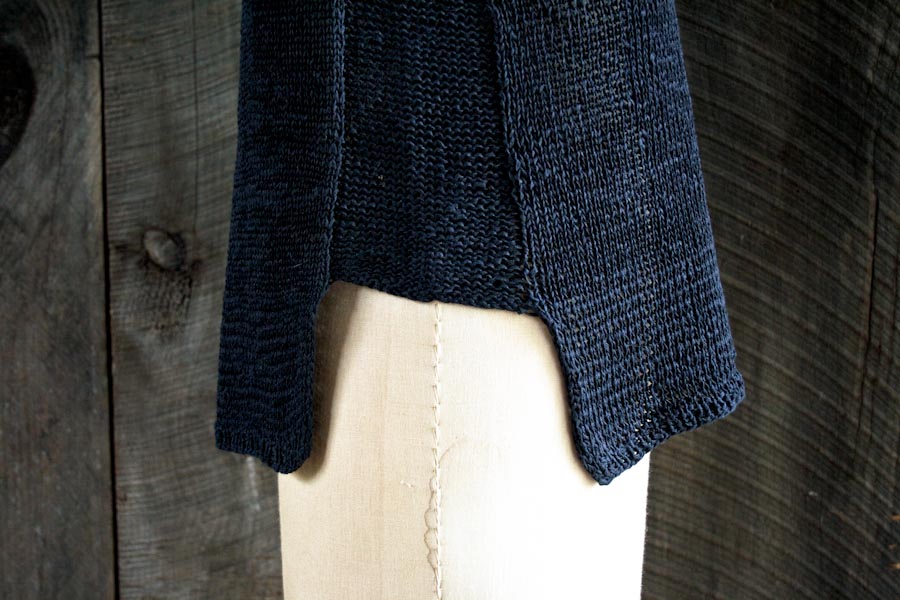
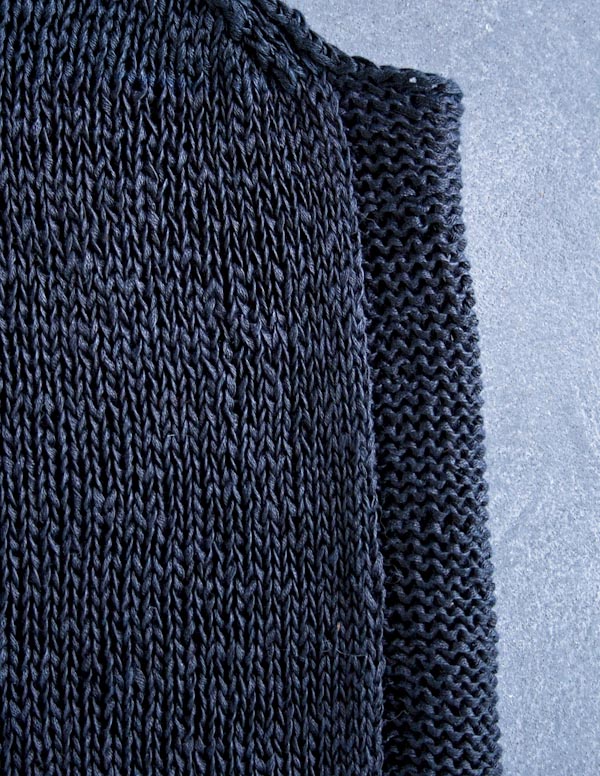
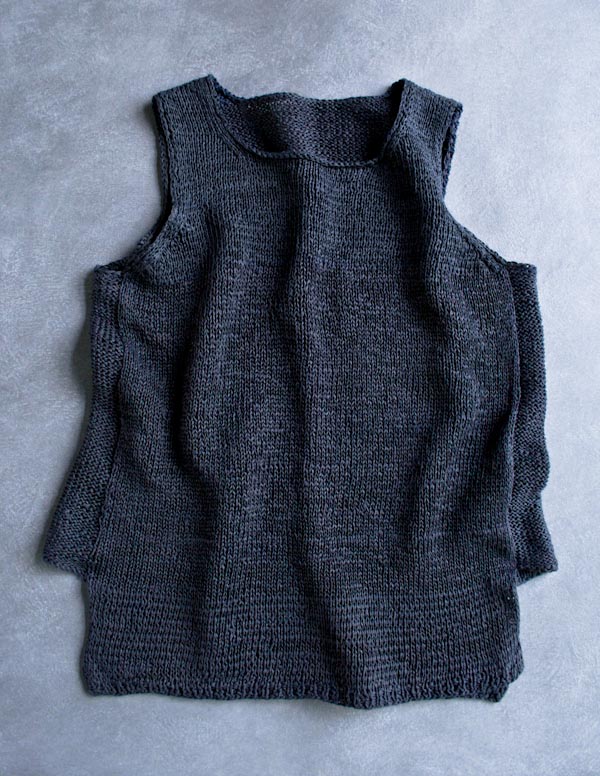
I used Knitted Linen to whip up this easy-fitting Notched Hem Tank Top. The front and back panels are in stockinette stitch, and the flattering side panels are in reverse stockinette. The notched hem, slightly longer in the back than the front, gives this tank an airy feel, just right for layering over shorts and skirts. Summertime, easy breezy knitting and beautiful indigo… Now we’re talking! -Gina
Designed by Purl Soho designer, Gina Rockenwagner. Click here to see even more of Gina’s designs!
Share your progress and connect with the community by tagging your pics with #PurlSoho, #PurlSohoBusyHands, and #PurlSohoNotchedHemTankTop. We can’t wait to see what you make!
Materials
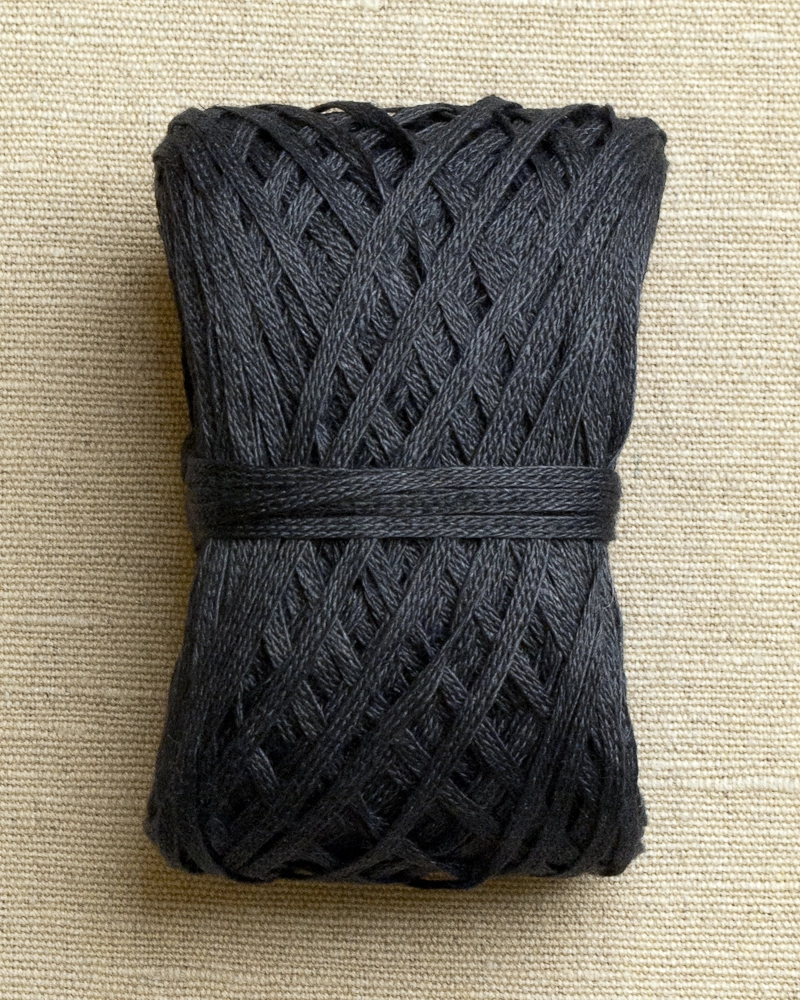
- 11 (12, 14, 15, 16) skeins of Habu Textiles’ Knitted Linen Tape, 100% linen; approximately 506 (552, 644, 690, 735) yards of a fingering weight yarn required. We used the color Dark Indigo.
- US 4 (3.5 mm) circular or straight needles
- US 7 (4.5 mm), 32-inch circular needle
- Stitch holders or scrap yarn
- A stitch marker
NOTE: Just like your favorite dark jeans, the indigo used to dye this yarn can transfer to light colored fabrics. Please wash the tank top separately from other items for the first couple of washes to prevent staining any light colored clothing.
Gauge
21 stitches and 28 rows = 4 inches in stockinette stitch, using the larger needle.
Sizes
NOTE For help picking a size, please check out our Understanding Ease + Selecting Size Tutorial!
34 (37, 40, 43, 46)
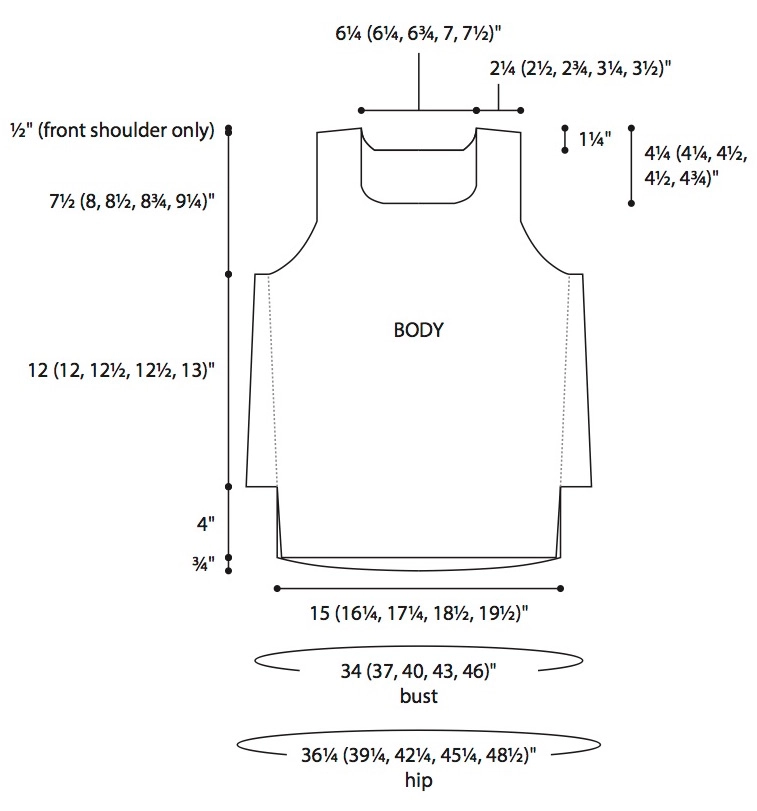
- Finished Chest Circumference: 34 (37, 40, 43, 46) inches
- Finished Length from Shoulder to Bottom Edge (Back): 24 ¼ (24 ¾, 25 ¾, 26, 27) inches
- Finished Length from Underarm to Bottom Edge (Front): 16 (16, 16 ½, 16 ½, 17) inches
Sample: Size 37 is pictured here, shown with 2 inches of positive ease.
NOTES
SHORT-ROW SHAPING: WRP-T (WRAP AND TURN)
NOTE: For more information about this technique, please visit our Short Rows tutorial.
On the right side: Keeping yarn in back, slip next stitch purlwise from left needle to right needle. Bring yarn to front. Return slipped stitch to left needle. Bring yarn to back. Turn work so wrong side is facing you.
On the wrong side: Keeping yarn in front, slip next stitch purlwise from left needle to right needle. Bring yarn to back. Return slipped stitch to left needle. Bring yarn to front. Turn work so right side is facing you.
PICKING UP PURL WRAP ON KNIT SIDE
NOTE: See this situation in action at minute 4:33 of our Short Rows tutorial.
Use tip of right needle to pick up wrap, inserting needle from front to back. Place wrap onto left needle, nudging wrap, if necessary, so it is after next stitch on needle. Slip first stitch knitwise, then slip wrap purlwise. Insert tip of left needle into front legs of two slipped stitches. Wrap working yarn around right needle to knit two together.
Pattern
Begin Back
*With the smaller needle(s), cast on 79 (85, 91, 97, 103) stitches. We used a basic Long Tail Cast On.
Ribbing Row 1 (wrong side): Slip 1 with yarn in front (wyif), *k1, p1, repeat from * to end of row.
Ribbing Row 2 (right side): Slip 1 with yarn in back (wyib), *p1, k1, repeat from * to end of row.
Repeat Ribbing Rows 1 and 2 until piece measures 1 inch from the cast-on edge, ending with a Row 1.
Change to larger needle and still working back and forth in rows…
Next Row (right side): Slip 1 wyib, knit to end of row.
Next Row (wrong side): Slip 1 wyif, purl to end of row.
Repeat the last two rows until piece measures 4 inches from the cast-on edge, ending with a wrong side row.**
Cut the yarn and place the stitches on a stitch holder or scrap yarn.
Begin Front
Work as for the “Begin Back” section from * to **.
Do not cut the yarn.
Join to Work in the Round
Knit across the 79 (85, 91, 97, 103) stitches of the Front; turn so the wrong side is facing you and cable cast on 16 (18, 20, 22, 24) stitches; turn so the right side is facing you, knit across the 79 (85, 91, 97, 103) stitches of the Back; turn so the wrong side is facing you and cable cast on 8 (9, 10, 11, 12) stitches, place a marker, cable cast on 8 (9, 10, 11, 12) stitches; turn so the right side is facing you.
Carefully checking to make sure the stitches are not twisted around the needle, join to work in the round. [190 (206, 222, 238, 254) stitches]
Continue in the Round
Note: Round 1 is a partial round to bring you back to the stitch marker, which now marks the beginning of the round.
Round 1: K79 (85, 91, 97, 103), p16 (18, 20, 22, 24), k79 (85, 91, 97, 103), p8 (9, 10, 11, 12).
Round 2: P8 (9, 10, 11, 12), k79 (85, 91, 97, 103), p16 (18, 20, 22, 24), k79 (85, 91, 97, 103), p8 (9, 10, 11, 12).
Repeat Round 2 until piece measures 7 inches from the cast-on edges of the Front and Back hems.
Shape Back and Body
Note: The Back is shaped with short rows, and the Body is shaped with decreases at the sides. If you need some short row pointers, please visit our Short Rows Tutorial.
Short Row 1 (right side): P8 (9, 10, 11, 12), k79 (85, 91, 97, 103), p16 (18, 20, 22, 24), k77 (83, 89, 95, 101), wrap and turn.
Short Row 2 (wrong side): P75 (81, 87, 93, 99), wrap and turn.
Short Row 3: K77 (83, 89, 95, 101), working wrapped stitch with its wrap as you come to it, p8 (9, 10, 11, 12).
Decrease Round 1: P7 (8, 9, 10, 11), k2tog, k77 (83, 89, 95, 101), ssk, p14 (16, 18, 20, 22), k2tog, k77 (83, 89, 95, 101), working wrapped stitch with its wrap as you come to it, ssk, p7 (8, 9, 10, 11). [186 (202, 218, 234, 250) stitches]
Next round: P7 (8, 9, 10, 11), k79 (85, 91, 97, 103), p14 (16, 18, 20, 22), k79 (85, 91, 97, 103), p7 (8, 9, 10, 11).
Repeat the last round until piece measures 10 inches from the cast-on edge of the Front hem.
Short Row 4 (right side): P7 (8, 9, 10, 11), k79 (85, 91, 97, 103), p14 (16, 18, 20, 22), k77 (83, 89, 95, 101), wrap and turn.
Short Row 5 (wrong side): P75 (81, 87, 93, 99), wrap and turn.
Short Row 6: K77 (83, 89, 95, 101), working wrapped stitch with its wrap as you come to it, p7 (8, 9, 10, 11).
Decrease Round 2: P6 (7, 8, 9, 10), k2tog, k77 (83, 89, 95, 101), ssk, p12 (14, 16, 18, 20), k2tog, k77 (83, 89, 95, 101), working wrapped stitch with its wrap as you come to it, ssk, p6 (7, 8, 9, 10). [182 (198, 214, 230, 246) stitches]
Next Round: P6 (7, 8, 9, 10), k79 (85, 91, 97, 103), p12 (14, 16, 18, 20), k79 (85, 91, 97, 103), p6 (7, 8, 9, 10).
Repeat the last round until piece measures 13 inches from the cast-on edge of the Front hem.
Short Row 7 (right side): P6 (7, 8, 9, 10), k79 (85, 91, 97, 103), p12 (14, 16, 18, 20), k77 (83, 89, 95, 101), wrap and turn.
Short Row 8 (wrong side): P75 (81, 87, 93, 99), wrap and turn.
Short Row 9: K77 (83, 89, 95, 101), working wrapped stitch with its wrap as you come to it, p6 (7, 8, 9, 10).
Decrease Round 3: P5 (6, 7, 8, 9), k2tog, k77 (83, 89, 95, 101), ssk, p10 (12, 14, 16, 18), k2tog, k77 (83, 89, 95, 101), working wrapped stitch with its wrap as you come to it, ssk, p5 (6, 7, 8, 9). [178 (194, 210, 226, 242) stitches]
Next Round: P5 (6, 7, 8, 9), k79 (85, 91, 97, 103), p10 (12, 14, 16, 18), k79 (85, 91, 97, 103), p5 (6, 7, 8, 9).
Repeat the last round until work measures 16 (16, 16 ½, 16 ½, 17) inches from the cast-on edge of the Front hem, ending 3 (4, 5, 6, 7) stitches before marker on final round.
Divide Work for Top Front and Back
Dividing Round: Bind off the next 6 (8, 10, 12, 14) stitches (removing marker), p2 (including the last stitch from bind off), k79 (85, 91, 97, 103) across the Front, p2, bind off the next 6 (8, 10, 12, 14) stitches, p2 (including the last stitch from bind off), k79 (85, 91, 97, 103) across the Back, p2.
Place the 83 (89, 95, 101, 107) stitches of the Front on a stitch holder or scrap yarn.
Top Back
Note: For the Top Back and Top Front, you will not be working in the round; you will work back and forth in rows.
Row 1 (wrong side): Slip 1 wyib, k1, purl to last 2 stitches, k2.
Decrease Row 1 (right side): Slip 1 wyif, k2tog, k77 (83, 89, 95, 101), ssk, p1. [81 (87, 93, 99, 105) stitches]
Decrease Row 2 (wrong side): P2tog tbl (through the back loop), p77 (83, 89, 95, 101), p2tog. [79 (85, 91, 97, 103) stitches]
Decrease Row 3: Slip 1 wyib, k1, ssk, knit to last 4 stitches, k2tog, k2. [2 stitches decreased]
Decrease Row 4: Slip 1 wyif, p1, p2tog, purl to last 4 stitches, p2tog tbl, p2. [2 stitches decreased]
Repeat Decrease Rows 3 and 4 four (five, five, five, five) more times, then repeat Decrease Row 3 once more. [57 (59, 65, 71, 77) stitches]
Next Row (wrong side): Slip 1 wyif, purl to end of row.
Next Row (right side): Slip 1 wyib, knit to end of row.
Repeat the last two rows until armhole measures 6 ¼ (7 ½, 8, 8 ¼, 8 ¾) inches, ending with a wrong side row.
Bind Off for Back Neckline
Bind Off Row (right side): Slip 1 wyib, k16 (17, 19, 21, 23), bind off 23 (23, 25, 27, 29) stitches, knit to end.
Place the first set of 17 (18, 20, 22, 24) stitches you worked on a stitch holder or scrap yarn. These stitches are for the Back Right Shoulder. You will work the Back Left Shoulder first.
Back Left Shoulder
Note: Continue working on the second set of 17 (18, 20, 22, 24) stitches.
Decrease Row 1 (wrong side): Slip 1 wyif, purl to last 4 stitches, p2tog tbl, p2. [1 stitch decreased]
Decrease Row 2 (right side): Slip 1 wyib, k1, ssk, knit to end of row. [1 stitch decreased]
Repeat Decrease Rows 1 and 2 once more, then repeat Decrease Row 1 once again. [12 (13, 15, 17, 19) stitches]
Next Row (right side): Slip 1 wyib, knit to end of row.
Next Row (wrong side): Slip 1 wyif, purl to end of row.
Armhole measures approximately 7 ½ (8, 8 ½, 8 ¾, 9 ¼) inches.
Cut the yarn and place the 12 (13, 15, 17, 19) stitches of the Back Left Shoulder onto a stitch holder or scrap yarn.
Back Right Shoulder
Slip the 17 (18, 20, 22, 24) stitches of the Back Right Shoulder to the larger needle. With the right side facing you, join a new ball of yarn to the Back Right Shoulder stitches, ready to work a right side row.
Decrease Row 1 (right side): Slip 1 wyib, knit to last 4 stitches, k2tog, k2. [1 stitch decreased]
Decrease Row 2 (wrong side): Slip 1 wyif, p1, p2tog, purl to end of row. [1 stitch decreased]
Repeat Decrease Rows 1 and 2 once more, then repeat Decrease Row 1 once again. [12 (13, 15, 17, 19) stitches]
Next Row (wrong side): Slip 1 wyif, purl to end of row.
Next Row (right side): Slip 1 wyib, knit to end of row.
Armhole measures approximately 7 ½ (8, 8 ½, 8 ¾, 9 ¼) inches.
Cut the yarn and place the 12 (13, 15, 17, 19) stitches of the Back Right Shoulder onto a stitch holder or scrap yarn.
Top Front
Slip the 83 (89, 95, 101, 107) stitches of the Top Front onto the larger needle. With the wrong side facing you, join a new ball of yarn to the Top Front, ready to work a wrong side row.
Row 1 (wrong side): Slip 1 wyib, k1, purl to last 2 stitches, k2.
Decrease Row 1 (right side): Slip 1 wyif, k2tog, k77 (83, 89, 95, 101), ssk, p1. [81 (87, 93, 99, 105) stitches]
Decrease Row 2 (wrong side): P2tog tbl, p77 (83, 89, 95, 101), p2tog. [79 (85, 91, 97, 103) stitches]
Decrease Row 3: Slip 1 wyib, k1, ssk, knit to last 4 stitches, k2tog, k2. [2 stitches decreased]
Decrease Row 4: Slip 1 wyif, p1, p2tog, purl to last 4 stitches, p2tog tbl, p2. [2 stitches decreased]
Repeat Decrease Rows 3 and 4 three (four, four, three, three) more times, then repeat Decrease Row 3 once more. [61 (63, 69, 79, 85) stitches]
Next Row (wrong side): Slip 1 wyif, purl to end of row.
Decrease Row 5 (right side): Slip 1 wyib, k1, ssk, knit to last 4 stitches, k2tog, k2. [2 stitches decreased]
Repeat the last two rows one (one, one, three, three) more time(s). [57 (59, 65, 71, 77) stitches]
Next Row (wrong side): Slip 1 wyif, purl to end of row.
Next Row (right side): Slip 1 wyib, knit to end of row.
Repeat the last two rows until armhole measures 3 ¾ (4 ¼, 4 ½, 4 ¾, 5) inches, ending with a wrong side row.
Bind Off for Front Neckline
Bind Off Row (right side): Slip 1 wyib, k16 (17, 19, 21, 23), bind off 23 (23, 25, 27, 29) stitches, knit to end.
Place the first set of 17 (18, 20, 22, 24) stitches you worked on a stitch holder or scrap yarn. These stitches are for the Front Left Shoulder. You will work the Front Right Shoulder first.
Front Right Shoulder
Note: Continue working on the second set of 17 (18, 20, 22, 24) stitches.
Decrease Row 1 (wrong side): Slip 1 wyif, purl to last 4 stitches, p2tog tbl, p2. [16 (17, 19, 21, 23) stitches]
Decrease Row 2 (right side): Slip 1 wyib, k1, ssk, knit to end of row. [15 (16, 18, 20, 22) stitches]
Next Row (wrong side): Slip 1 wyif, purl to end of row.
Decrease Row 3 (right side): Slip 1 wyib, k1, ssk, knit to end of row. [1 stitch decreased]
Repeat the last 2 rows two more times. [12 (13, 15, 17, 19) stitches]
Next Row (wrong side): Slip 1 wyif, purl until end of row.
Next Row (right side): Slip 1 wyib, knit until end of row.
Repeat the last two rows until armhole measures 7 ½ (8, 8 ½, 8 ¾, 9 ¼) inches, ending with a wrong side row.
Short Row 1 (right side): Slip 1 wyib, k7 (8, 10, 12, 14), wrap and turn.
Short Row 2 (wrong side): Purl to end of row.
Short Row 3: Slip 1 wyif, k2 (3, 5, 7, 9), wrap and turn.
Short Row 4: Purl to end of row.
Next Row (right side): Slip 1 wyif, knit to end, picking up the wraps as you come to them and knitting them together with the stitch they wrap.
Do not cut the yarn.
Turn the garment inside out. Place the stitches of the Back Right Shoulder onto a spare needle in a similar size. Hold the two needles parallel, with the right sides of the pieces together and so that the wrong side of the Back Right Shoulder is facing you. With a third needle in a similar size, work a 3 needle bind off across all stitches, using the ball of yarn attached to the Front Right Shoulder. Cut the yarn and thread the tail through the last remaining stitch. Pull gently to secure. Turn the garment right side out.
Front Left Shoulder
Slip the 17 (18, 20, 22, 24) stitches of the Front Left Shoulder to the larger needle. With the wrong side facing you, join a new ball of yarn to the Front Left Shoulder, ready to work a wrong side row.
Decrease Row 1 (wrong side): Slip 1 wyif, p1, p2tog, purl to end of row. [16 (17, 19, 21, 23) stitches]
Decrease Row 2 (right side): Slip 1 wyib, knit to last 4 stitches, k2tog, k2. [15 (16, 18, 20, 22) stitches]
Next Row (wrong side): Slip 1 wyif, purl to end of row.
Decrease Row 3 (right side): Slip 1 wyib, knit to last 4 stitches, k2tog, k2. [1 stitch decreased]
Repeat the last two rows two more times. [12 (13, 15, 17, 19) stitches]
Next Row (wrong side): Slip 1 wyif, purl to end of row.
Next Row (right side): Slip 1 wyib, knit to end of row.
Repeat the last two rows until armhole measures 7 ½ (8, 8 ½, 8 ¾, 9 ¼) inches, ending with a right side row.
Short Row 1 (wrong side): Slip 1 wyif, p7 (8, 10, 12, 14), wrap and turn.
Short Row 2 (right side): Knit to end of row.
Short Row 3: Slip 1 wyib, p2 (3, 5, 7, 9), wrap and turn.
Short Row 4: Knit to end of row.
Next Row (wrong side): Slip 1 wyif, purl to end, picking up the wraps as you come to them and purling them together with the stitch they wrap, Do not cut the yarn.
Turn the garment inside out. Place the stitches of the Back Left Shoulder onto a spare needle in a similar size. Hold the two needles parallel, with the right sides of the pieces together and the wrong side of the Front Right Shoulder facing you. With a third needle in a similar size, work a 3 needle bind off across all stitches, using the ball of yarn attached to the Front Left Shoulder. Cut the yarn, thread the tail through the last stitch. Pull gently to secure. Turn the garment right side out.
Finish Armholes
With the larger needle and the right side facing you, beginning at the center of the underarm, pick up and knit 72 (80, 86, 90, 94) stitches evenly around the armhole edge. Loosely bind off all stitches.
Repeat for other armhole.
Finish Neckline
With the larger needle and the right side facing you, beginning at the left shoulder seam, pick up and knit 63 (63, 67, 69, 73) stitches along the Front Neck and 43 (43, 45, 47, 49) stitches along the Back Neck. [106 (106, 112, 116, 122) stitches total]. Loosely bind off all stitches.
Weave in the ends.
Block the tank top by hand washing it separately from other items in cold water with a mild detergent. Rinse until the water runs clear. Some indigo will wash out, but don’t worry; the tank top will come out the same beautiful, dark indigo color!


Indigo + linen tape yarn + tank top = a perfect combination! This would be great beach knitting. I am so delighted by this pattern!
Thanks so much Grace! You’re right, this would make perfect beach knitting. Have a great Summer!
What a gorgeous pattern! Thank you so much for sharing! Can’t wait to cast it on!
Thanks Alina! Your comment made my day. -Gina
This is a beautiful garment but the price and amount required of the suggested yarn renders the project cost prohibitive to those of ordinary means.
Hi Contance,
Thanks so much for writing us. We are always happy to recommend cost-friendly yarns for our projects. This tank top could be made in Euroflax Linen. We also have a new linen yarn that is beautiful and very cost effective. It’s called Bockens Tow and you should knit with it held double to make this tank top. You could also use Cascade Ultra Pima, for a cotton option. Let me know what you think of those options. Thanks again for your kind words. -Gina
thanks so much for this! I was thinking the same thing!!
Thank you, Vanessa!
Thank you so much for providing the alternatives–I’m wondering, will the pattern change at all if I were to use the Cascade Ultra Pima?
Hi Samantha,
Thank you for the comment! I think that would be a fine substitute, it will just create a much different quality of fabric. I would do a gauge swatch in the Ultra Pima to double check that the gauge is similar enough but based on our store swatch they are similar enough that I don’t anticipate needing to change the pattern at all. However be aware that the Ultra Pima will not stretch like the linen tape when choosing which size to make!
I hope this help and feel free to write back if you have anymore questions!
Happy Knitting!
Jake
Hello.
Is there a possibility to get this pattern in Dutch ?
I’m from Holland and it’s very hard for me to read this.
Thanks,
Madelon van Deemter
Dalfsen, the Netherlands
Hi Madelon,
Unfortunately we don’t have the ability to translate this pattern into Dutch. But perhaps a fellow Dutch-speaker will see your comment and help you out with this! Thanks so much for writing us! -Gina
This is beautiful, but $150.00 for a tank? ??
Hi Ann,
Thanks so much for writing us. We are always happy to recommend cost-friendly alternatives for our projects. This tank top could be made in Euroflax Linen. We also have a new linen yarn that is beautiful and very cost effective. It’s called Bockens Tow and you should knit with it held double to make this tank top. You could also use Cascade Ultra Pima, for a cotton option. Let me know what you think of those options. Thanks again for your kind words. -Gina
This is such a beautiful piece of work, so inspiring! Thanks for sharing.
🙂
Thanks so much for your kind words, Cristina! -Gina
I would love to do this pattern but don’t wear sleeveless, any suggestions as to how to add short or capsleeves to it???
or is there another pattern you might suggest for this yarn with short sleeves.
Thanks
Joanne
Hi Joanne,
Thanks for writing in! Another reader had a similar question, here’s what I suggested:
You could add sleeves to this, it wouldn’t be a beginner modification but it’s definitely do-able. Follow the directions for finishing the armholes, but instead of binding off, you can join to work in the round. Throw a decrease in the underarm every couple of rounds until the sleeve is the width you want. Then continue straight and bind off when the sleeve is the length you want. Let me know what you think of this idea. Happy knitting! -Gina
If I were to add either a long sleeve or 3/4 sleeve, how much additonal yarn would I need?
Hi Robin,
I would suggest getting at least 370 additional yards for a 3/4 length sleeve, or more for a longer sleeve. Keep in mind, you can return unwound yarn for store credit, so it’s always good to err on the side of more!
Thanks for writing us! Happy knitting -Gina
I’m wondering why it takes 26 pages to print this out? Very odd for such a simple pattern. Which, by the way, is beautiful.
Hi Yanage,
Thanks so much for writing us with your question! Sorry you’re having problems printing this. Let me know if following these instructions help you to print.
If you’re on a desktop version of the site, you will find a “print” icon in the right column just below the date and tags. If you’re on a mobile version of the site, you will find a “print” icon below the pattern and above the comments.
Follow the easy on-screen instructions to delete whichever parts of the pattern you don’t want to print or save. For example, you may decide to shorten the pattern by omitting certain images or the list of materials.
All my best, Gina
Hello, a great design, as always! Do you know if one could use Euroflax Linen for this project as a substitute? (the same yarn you used for the Linen Raglan Sweater project?) Thank you.
Hi Amy,
Thanks so much for writing us! Euroflax would be a great choice for this project. Happy knitting! -Gina
Hi Gina! I have some Euroflax Sport in my stash and I find it very tiny, more in the fingering range than DK or light worsted. Since you do recommend it for this project, I imagine that the fabric would be more airy and “open work”-like? Or is there other Euroflax weights I’m yet to discover? Thank you!
Hi Noemie,
Thanks for writing us! I’m referring to the Euroflax that is approximately 247 meters per 100 grams. I did a swatch at the gauge required for the tank, it was slightly sheer, but not like open work at all. I think it would be a great choice for this tank!
For a second, I believe Louet did offer another weight of Euroflax, but I think it has been discontinued. If you’re interested in thinner yarns similar to Euroflax, we just started carrying a beautiful linen called Bockens Tow. You would need to double it to make the tank (how cute would a marled tank be!?), but I thought I’d suggest it because it seems like you’re a bit of a linen fiend like I am!
Please let me know if I can help with any other questions! Happy knitting -Gina
any chance of adding 3/4 sleeves to this lovely notched hem tank?
Would be multi-seasonal. Love your designs
Hi Carolyn,
Thanks for writing us! Another reader had the same question. Here’s what I suggested:
Thanks for writing us! You could add sleeves to this, it wouldn’t be a beginner modification but it’s definitely do-able. Follow the directions for finishing the armholes, but instead of binding off, you can join to work in the round. Throw a decrease in the underarm every couple of rounds until the sleeve is the width you want. Then continue straight and bind off when the sleeve is the length you want. Let me know what you think of this idea. Happy knitting! -Gina
I just love this, thank you very much for you generosity.
M.M.
Thanks so much for reading, Micheline!
Just where I was waiting for. Great design and also that linen tape is unbelievable great in its colors.
Thanks so much Marthe! I love the colors of the linen tape too. The bright blue is just gorgeous in person.
I wish the instructions were in spanish. I don’t even know if what I am writing right now is correct.
The medition system is very different here (in Chile). It shows in the sizes of the knitting needles and more stuff like that.
However, this is a beautiful work. I wish i can knit it 🙁
Hi Giancarla,
Thanks for writing us!
I used a US #4 needle for this project, that is the same as a 3.5 mm needle.
I speak a little Spanish and have traveled in Peru teaching knitting, so I’m happy to help if you have specific questions about translating the pattern for your own use. For example, where it says to “Cast on…” in Peru (this might be different in Chile) they would say “Monte…” I hope that helps! I’m always available to answer any questions you have. Please let me know! Espero que usted tenga un buen fin de semana! Hasta la proxima! -Gina
I would like to print the pattern and check your prices.
Hi Shirley,
Thanks for writing us!
Here’s how to print:
If you’re on a desktop version of the site, you will find a “print” icon in the right column just below the date and tags. If you’re on a mobile version of the site, you will find a “print” icon below the pattern and above the comments.
Follow the easy on-screen instructions to delete whichever parts of the pattern you don’t want to print or save. For example, you may decide to shorten the pattern by omitting certain images or the list of materials.
To check the price of the Knitted Linen yarn, please click this link.
All my best, Gina
Thank you so much for this pattern-love it!
I also love linen!
This pattern came at the PERFECT time! Casting on now!
Thanks so much Hannah! It’s so great to hear that. I’m making one for myself too! Enjoy! -Gina
Well, gosh, I’m so glad I hadn’t gotten too far on the sweater I thought I wanted so I can switch immediately to this one. Your designs are so elegant in their simplicity, but also feel cutting edge. Thanks so much!
Hi Karen, I can’t decide whether to apologize for the change of plans or thank you for your kind words, so I guess I will do both! Sorry for the knitting U-turn, but also thanks so much for the compliment! I really appreciate it. Happy knitting and happy Summer! -Gina
Hi Gina! I have ordered the Euroflax in Sunset (yummy yum yum) and can’t wait to get going. I do have a question, tho. Is this yarn likely to grow width-wise? I’m thinking that if it ends up not too snug, I can always wear a tee under it (solving the sleeve vs sleeveless issue and bra show-through. Haven’t swatched yet – just sitting and drooling (and I really should finish the other linen cardi that seems to have grown width wise and is almost finished.) Thanks so much! Also, do you think it will shrink much in length? I’m tall to begin with and will have to lengthen it anyway. Can’t wait to wear it!
Hi Karen,
Thanks for writing us! I love that color too. It would look divine with gray or white pants or a skirt.
My experience with this yarn is that it actually grows lengthwise with wear. The tank should not grow too too much width wise. I would have this concern if the garment had sleeves. Sleeves tend to grow width wise with wear, because of the movement of your arms. The tank top should fit slightly loose, that was my intent with the design. Please let me know if that helps to answer your question, or if any more questions arise. I’m always happy to help. Send us a picture when you’re finished, if you’re not too shy! Happy knitting -Gina
Hi Gina, thanks for the tips. I’m casting on this morning – can’t wait. I have spent the weekend staring at the yarn. Thanks from all of us for your kind words and technical hints. I feel like I’m sitting with a group of old friends.
This is a beautiful tank top, I can’t wait to start making it. Could you please confirm that it requires 11-12 skeins? That seems like a lot for a tank top.
Hi Paola,
Thanks so much for your kind words! This tank top requires 11 skeins of the Habu Textiles Knitted linen, however, each skein contains only 92 yards. So it’s not quite as much as it might sound like. Let me know if I can help with any other questions. -Gina
Hi Paola,
We recently received notification from Habu Textiles that the yarn was labeled with the wrong yardage. Knitted Linen actually has 56 yards per skein, not the 92 yards listed on the label. We are so sorry for the confusion and hope it did not cause any inconvenience! Thanks so much. -Gina
Lovely little top.. Thanks for such a nice gift. Can’t wait to cast on. You can get this pattern down to 7 pages by taking out the pix and little notes not needed for the pattern.. Not that I don’t enjoy the pix and notes!
Thanks so much Debra! I’m so flattered by your kind words.
Love this pattern-thank you!
Linen is one of my favourite yarns…
You mentioned above that Euroflax could be substituted-would you suggest the same needle size?
Hi Carol,
Thanks for writing us! You should use which ever needle gets you the gauge listed in the pattern. Start by making a swatch with the Euroflax and the recommended needles. If you don’t get the correct gauge with these needles, that means you need to adjust your needle size. I hope you enjoy knitting this! All my best, Gina
This is so lovely. Can’t wait to start. This will be my second garment.
Thanks for your kind words Tammy! Congrats on knitting your first garment.
do you think you could make this dk wostered yarn to wear over a shirt
Hi Lynn,
Thanks for writing us with your question. You can certainly make this to wear over a shirt, just make sure you’re getting the same gauge listed in the pattern. Happy knitting! -Gina
everyone is out of the dark indigo yarn. Are you going to get more? I love this color – the piece is so beautiful!
Hi Lisa,
Thanks so much for writing us. We’ve ordered more dark indigo, and we’ll email you as soon as it arrives. Thanks for your kind words. -Gina
Another stunning design, Gina! Can’t wait to cast on and enjoy this practical, wearable piece!
Thanks so much, Maria. You are too kind.
Lovely pattern.
Could you let me know please how to translate from US sizes, to UK. To include Needles.
Thank you
Hi Maxine,
Thanks for writing in.
A US #4 needle is the same as 3.5 mm
A US #7 needle is the same as UK #7 or 4.5 mm.
I convert from inches to centimeters by typing the numbers into google like this “17 inches in cm”, the search engine gives you the conversion. Or you can measure with a double-sided tape measure, one that has centimeters on one side and inches on the other.
I hope that helps! -Gina
This is so cool. I don’t really wear tank tops though. Do you think it would be hard to add sleeves?- Thanks, Jules
Hi Jules,
Thanks for writing us! You could add sleeves to this, it wouldn’t be a beginner modification but it’s definitely do-able. Follow the directions for finishing the armholes, but instead of binding off, you can join to work in the round. Throw a decrease in the underarm every couple of rounds until the sleeve is the width you want. Then continue straight and bind off when the sleeve is the length you want. Let me know what you think of this idea. Happy knitting! -Gina
Any chance you will be getting this yarn back in stock soon?!
Hi Kate,
Thanks for writing us! We have ordered more Knitted Linen tape. We will email you as soon as it arrives. If you just cannot wait, let me know and I’ll suggest some alternatives! I know summer is coming soon and we want to wear our tanks while the weather is nice. I’m in the same boat myself! All my best, Gina
This is a beautiful top. Just to be sure, is the body knitted with the larger or smaller needles?
Hi Irene, Thanks for writing us with your kind words and question!
Sorry for any confusion. I used the smaller needles for the ribbing at the front and back hem only. The body was knitted on the larger needles. Please let me know if that makes sense, and if I can help with any other questions! All my best, Gina
Lovely pattern! I’m a teacher, but as soon as school is out I’m going to start working on this. And thanks for some of the budget-friendly yarn suggestions in the comments!
Hi Sarah, Thanks so much for your kind words. Good luck with the end-of-year craziness! All my best, Gina
Amazing pattern….was in the store Saturday and bough the dark indigo not only for myself but for my sister! Quick ? I am in the midst of doing a gauge and the pattern calls for #7 for gauge but then when I read above comments you state you used a #4 for the project. My gauge on a #7 was way too big…did you use a #4 for the entire project and the gauge on the pattern needs to be adjusted to reflect this? Can’t wait to start knitting and even more excited to wear the garment all summer.
Hi Steph,
Thanks so much for writing us!
Sorry for any confusion. I used a #4 for the ribbing only, and a #7 for the body of the tank. I would strongly urge you to do a swatch in the round as well. I know it’s a little extra trouble, but it will save you lots of heartache. I tend to be somewhat of a loose knitter, if that helps at all, but when I joined in the round my gauge became tighter. It sounds like you need to use smaller needles. Please let me know if that helps. I’m happy to help you troubleshoot more!
Have a great day, Gina
What a lovely, cool-looking top! I’ll bet it’d be extremely comfortable in hot and humid North Florida! I want to make this.
Love your patterns!
What type of needles were used? Wood, composite, metal?
(My sister is Steph – above and we are going to do this as a KAL)
I do find that it makes a difference –
(haven’t done my swatch yet- but will do it in the round as you suggest) She is using smaller needles, and it’s still big.
Hi Ellen, This is a great question.
I used Addi Turbo Rockets, which are metal and have an extra pointy tip that helps you get under that tape with ease.
I’ll let you know, I’m a bit of a loose knitter, but I found that my gauge was really tight with the linen tape, the opposite of what I usually expect from my knitting. I had to actively try to knit loosely and stay relaxed as I was knitting. Also, my gauge was totally different flat and in the round, which is not typical for me. It must have something to do with the tape!
It’s perfectly fine to use smaller needles to get gauge. Maybe switching to metal will help you and/or your sister knit tighter, as the stitches will slide more easily. Let me know if any of this helps you, if not, I can make some more suggestions.
On another note, I just imagined you and your sister knitting this together, and it totally warmed my heart. I miss my sister every day (she lives in California, she writes screenplays). Aren’t sisters just the best? I hope you guys enjoy knitting this together! Thanks for writing us! -Gina
When the pattern says “This piece is designed to fit with a 2-inch ease.” do you mean negative or positive ease? AKA, do I knit bigger than my measurements or smaller? Also, is the bust size being measured the full breast measurement or high bust? There is a few inches of difference for me.
I’m excited to get started!
Hi Monica,
Thanks for writing us! This tank is supposed to fit with positive ease, meaning the tank top will be 2 inches bigger than your bust measurement. Measure around the fullest part of your bust.
Please let me know if I can help you out with any other questions.
Enjoy! -Gina
Hi Gina,
Just truckin along on this tank, which I love, but I had a question. On the short rows for the back. I did the third short row, but I am confused about the decrease row. Do I need to keep knitting the row for short row three then decrease for the next row? Same for the other short row to decrease rows. Thank you so much for the pattern!
Carmen
Hi Carmen,
I’m glad you’re enjoying knitting this!
I can see how the short row to decrease row transition can be confusing. Let me try to clarify.
Once you finish short rows 1, 2, and 3, you’ll again be at the beginning of the round. The next round is a decrease round, so you’ll purl until you have 1 purl stitch left, then k2tog, then continue following the instructions for this row to decrease on either side of each side panel. This will be the same for every short row to decrease round. You’ll work the 3 short rows in sequence, then on the next round, you’ll work the decreases. Does that help clarify? It might also help to think of the 3 short rows as parts of the same row. When you work the 3 short rows, you’re actually only working 1 full round. Let me know if this helps and perhaps I can try to explain another way. Thanks so much for writing us! -Gina
I think I am still confused. I did the short row of knit 77 and purl 8. The next stitch after I purled the 8 is a knit across the front. Do I just purl over the knitted stitches? I know that cant be right. The decrease row has more stitches in it than were cast on. Or did I just do all the short rows wrong? Eeek!
Short Row 3: K77 (83, 89, 95, 101), p8 (9, 10, 11, 12).
(This is my confusion. I just purled 8 and then I need to purl 7 over the knitted stitches. I’ve never done that before and it seems wrong. So I’m sure I’m misreading something. And my short row 3 is on the right side. )
Decrease Round 1: P7 (8, 9, 10, 11), k2tog, k77 (83, 89, 95, 101), ssk, p14 (16, 18, 20, 22), k2tog, k77 (83, 89, 95, 101), ssk, p7 (8, 9, 10, 11). [186 (202, 218, 234, 250) stitches]
I hope I am not being a pain and maybe clarified myself a little better. Thank you Gina for taking the time to answer questions.
Carmen
I forgot to cast on the other 8 stitches for one side. I had 16 purls on one side and 8 on the other. I’m an idiot!
Hi Carmen – I’m glad you figured it out! It’s an easy mistake to make. Conceptualizing things we have not made before can sometimes be the hardest part of a project. Don’t beat yourself up over it! Sorry I wasn’t more available to help you with this. Please let me know if any more questions come up for you! All my best, Gina
Hi there! Lovely pattern and I’ve been enjoying knitting it up so far.
I believe there is a mistake in the following row. Where it says k14 (16, 18, 20, 22) should be purl?
Decrease Round 1: P7 (8, 9, 10, 11), k2tog, k77 (83, 89, 95, 101), ssk, k14 (16, 18, 20, 22), k2tog, k77 (83, 89, 95, 101), ssk, p7 (8, 9, 10, 11). [186 (202, 218, 234, 250) stitches]
Thanks again for the beautiful piece!
Hi Sofya,
Thanks so much for writing us!
You are absolutely right! It should say p14, not k14. I’ve corrected the pattern. If you’ve printed the pattern, you may want to just make a note on the print out, to avoid printing the pattern again and wasting paper.
Thanks again! -Gina
Hi Gina,
First thank you so much for this lovely pattern. I have casted on with the euro flax after a couple of false starts with the linen raglan left me frustrated. I am a total newbie, but quick learner. I am a little confused by the instruction once you join and begin knitting in the round. So bear with me… If you are at the stitch marker, which is at the center of the side, wouldn’t the first instruction be to purl for 10, knit 91, purl 20, knit 91, purl 10? Instead the instructions begin with knitting 91. I suspect that first half of the side may have been overlooked, but it is also SO entirely possible that my lack of experience is just confusing me! Does my question make sense? Thank you again for all you guys do for the knitting community. Always such lovely pieces!
Hi Eve,
Thanks for writing us with your question!
The first round starts with Knit 91 because it is a partial round to bring you back to the stitch marker. When you knit 91, you should have just casted on 10 stitches for the half of the side panel that comes right after the marker. Does this make sense? Theres a note that explains this, right under the heading “Continue in the Round”, but thats easy for a beginner to miss. Let me know if my answer helps, and if it doesn’t, I’ll try to explain in another way.
Happy knitting! -Gina
I am obsessed with your tank, and am ready to start, but uncertain as to size. I measure 36″ bust for myself, so adding two inches of positive ease puts me at 38″ – better to make 37″ or 40″? Hmmm… I also measured hips and same problem, I’m also 1″ of ease…. Thanks for any advice..
Hi Kate,
Thanks for writing us with your question!
I’d say, if you have a short torso, make the smaller size. If you have a normal or long torso, I’d make the larger size. The reason for this is, if the top fits slightly tight at the bust, you’ll actually lose a little bit of length on the top, and we want you to be fully covered! Let me know if that makes sense. I hope you enjoy knitting this! -Gina
I love the pattern. Did you wash your swatch in order to obtain the gauge listed in the pattern?
Hi Catherine,
Thanks so much for writing us with your kind words!
I did wash my swatch to get the gauge listed. In my mind, the top is not finished until it’s washed. The yarn gets so much softer when you wash it. It’s vital to wash your swatch as well. I’m sure you’ll see what I mean! Please let me know if I can help with any further questions. -Gina
This pattern looks superb.
As more of your followers I am not american.
I don’t expect the Purl Bee to translate every pattern but
have you ever considered adding a converter to european sizes?
Thank you for an inspiring website!
Hi Maria,
Thanks so much for writing us with your comment and compliment!
I was not aware a converter for European sizes existed! I’d love to see what you’re talking about. Can you please send a link to the converter to this address: gina@purlsoho.com
We will definitely consider it.
Thanks in advance! -Gina
Hello and thank you for this lovely pattern!
I’m just a beginner, so could you please help me understand this part of the pattern: when we start working in short rows, is it also done with circular needles, like the previous part of the knitting, or should we knit this part with both circular and knitting needles?
Thanks a lot!
Hi Elena,
Great question. You will continue knitting on the circular needles for the short row section. Please let me know if that helps! Thanks so much for writing us. -Gina
Thanks a lot, Gina! I was a little bit confused at first, but then proceeded with short rows and I see how it works now!
I’ve been admiring your designs for quite some time, but was afraid to start anything more complicated than a scarf. And then I saw this gorgeous top and the pattern didn’t seem too scary and i also happened to have an indigo linen yarn my friend gave me as a gift some time ago, so I’m very excited to work on it now! 🙂
You’re very welcome, Elena! Please let me know if I can help with anything else. Enjoy! -Gina
hello, very beautiful pattern. Am I right if I order 2 skeins of EUROFLAX LINEN ? is it enought for size 40/43 ? THANKS
Hi Catherine,
Thanks so much for your question and kind words!
For the size 43, you will need 5 or 6 skeins of Euroflax. I would recommend buying 6 skeins but only wind 5. You can return the 6th skein if you do not need it.
Please let me know if I can help with any other questions. -Gina
Hi Catherine,
We recently received notification from Habu Textiles that the yarn was labeled with the wrong yardage. Knitted Linen actually has 56 yards per skein, not the 92 yards listed on the label. That means that the tank top actually takes half as much yardage as we originally thought! We are so sorry for the confusion and hope it did not cause any inconvenience! Thanks so much. – Gina
Love this yarn and color but I am not an experienced knitter. The pattern scares me! Could I make a wrap with this? Would it drape nicely? Or should I pair with a habu soft cotton yarn? Any thoughts, or recommendations for a shawl/wrap would be welcomed.
Hi Phyllis,
Great question! I think this yarn would make a beautiful wrap. The linen drapes beautifully. My suggestion would be to knit this on larger needles for a wrap. Try a swatch on a number 9 needle and see how you like it. A looser gauge will drape better and you’ll get more out of the yarn. Also make sure to wash the wrap and block it! I would knit the wrap like this:
Cast on as many stitches as you need to get the width you like. For a wrap, between 12 and 18 inches is good, depending on what you prefer.
Wrong side row: Slip one wyif, K1, P1, K1, purl until last 4 stitches, k1, p1, k1, p1.
Right side rows: Slip 1 wyib, p1, k1, p1, knit until last 4 stitches, p1, k1, p1, k1.
Repeat these two rows until the wrap is the length you want, then bind off in pattern.
Working the selvedge edges like this keeps the wrap from curling in too much. The cast on and bind off edges naturally don’t curl too much. Let me know what you think! Thanks for writing us -Gina
for this top would 2 skeins be enough? since you are ment to use it dobled?
Hi Annette,
Thanks for writing us! I’m not sure what yarn you’re asking about. Can you please write me back with the name of the yarn? I’ll let you know how many skeins to buy!
My first guess is you’re referring to the Bokens Tow linen, because the yardage on these skeins is huge! For the 2 smaller sizes, you will need only 2 skeins of Bokens Tow Linen. If you are making a size larger than that, you’ll need 3 or 4. Let me know if I answered your question! Happy knitting! -Gina
yes thank you for your answer i was refering to the bokens tow linen sorry for not mentioning it i will order them now
I found some errata’s in this pattern. Where can I mention that???
It is first in: Decrease Round 1: P7 (8, 9, 10, 11), k2tog, k77 (83, 89, 95, 101), ssk, k14 (16, 18, 20, 22), k2tog, k77 (83, 89, 95,: this s hould be P14(16,18…).
The next one is:Decrease Row 2 (wrong side): P2tog tbl (through the back loop), p77 (83, 89, 95, 101), p2tog. [79 (85, 91, 97, 103)
stitches]
Decrease Row 3: Slip 1 wyib, k1, ssk, knit to last 4 stitches, k2tog, k2. [2 stitches decreased]
Decrease Row 4: Slip 1 wyif, p1, p2tog, purl to last 4 stitches, p2tog tbl, p2. [2 stitches decreased] The decrease wor on the purl side should always begin with purl 2 together tbl, otherwise the slant is wrong. It is turned around and it should be like the first mentioning of the purling through the back loop what was correct.
Hi Marthe,
You can let me know right here! And thanks so much for doing so.
The first error you mentioned has already been corrected, but you must have printed the pattern before I made the corrections. Sorry about that!
For the second one you mentioned, are you referring to the Top Back section? I’ve just checked over this section again, and it is correct. It’s a little hard to explain why, but here goes! When you separate the front and back stitches for the top section, you bind off stitches on either side for the under arms, but you still have a couple purl stitches on the edges of the purl sections. These stitches need to go away over the next two rows to make the arm hole rounded at the bottom. Once you’ve reached decrease row 4, all the purl stitches are gone, so the slant of the decreases changes directions to make the top taper in towards the shoulders. I hope that makes sense! Please let me know if you find anything else funky. -Gina
Hi; If you wanted to do some dyeing in your “tiny apartment”, you could try crock pot dyeing. I love it because it is so easy and you don’t have to fuss with it. Judy from Vancouver Island
Hi Judith,
Thanks so much for the suggestion! I do dye a lot in my apartment, sometimes I use a glass dish covered with a plastic lid in the microwave, or in a pot with a steamer rack set over the boiling water (I use special pots and tools for dyeing, they’re not the same ones I use to prepare food!). I really want to get into crock pot dying, but my boyfriend loves to eat things in a crock pot and I’m not sure I could justify having two crock pots, one for food prep and one for dyeing! Long story short, the reason I can’t do real indigo dying in my apartment is, the dye bath needs to sit out and ferment. I have a very curious kitten who loves water! I’m not kidding, I find her splashing in the bath tub while the water drains all the time, and she often wakes me up by dipping her paw into the water cup on my bedside table and shaking it on me. Anyway, that’s probably way more than you needed to know, but I’m terrified to come home to find an indigo colored cat (we like her orange, the way she is!) and blue stains all over my furniture, plus I’m sure the dye could poison her. Our kitten is one of the “roommates” I was referring to! Please send me tips whenever you think of them! I love learning from our readers. Thanks again! -Gina
This pattern is gorgeous! I am so excited to cast on. If I am using a different yarn (Berroco Fiora) and my gauge swatch shows I should use a US #5, what size needle should I use for the bottom hem ribbing?
Thank you!
Tali
Hi Tali,
Thank you for the comment! I always like to go down one needle size for ribbing, so a US #4. I also usually try a little section of ribbing at the beginning or end of my gauge swatch just to double check.
I hope this helps and feel free to write back if you have anymore questions!
Good Luck!
Jake
Thank You for this amazing pattern. I need a Little help: in begin back, when you say “slip 1 wyif” and “slip 1 wyib” I see how to move the yarn in front or to back, but how should I slip the stitch? Knitwise or purlwise?
Hi Debora,
Thank you for the comment! The stitches should be slipped purl-wise.
Feel free to respond if you have anymore questions!
Happy Knitting!
Jake
Hello, do there exist explanations in French? I métrise absolutely not English, but I would have liked much to produce this sweater. (afflicted if the translation is not correct I use an automatic translator 😉
thank you very much for your answer
Catherine
Hi Catherine,
Thank you for writing us.
I’m sorry to say, but we do not offer instructions in French.
All my best,
Gina
This is my first time trying the wrap and turn and I’m stuck with picking up the 2nd wrap. I did the wrap on the purl side (short row 2) and now I need to pick up that wrap in the next round (decrease round 1). Since this is knitted in the round and I’m facing the right side, the wrap now is coming from the left. How do I pick up that wrap without getting a hole? I hope I’m making myself clear. Ty!
Hi Sofie,
Thank you for the comment! This is a great question! When you go to pick up and knit the wrap you are actually going to knit it with the stitch to the left of the wrap, rather than the stitch that you turned the work at. That should close up the hole fine. That is rather confusing I’m very glad you brought it to my attention!
Good luck and feel free to write back if you have anymore questions!
Happy Knitting!
Jake